
This article is tangential to playing ASL. Speaking about storage systems is likely to cause a holy war akin to a classic IFT/IIFT debate. With that in mind, what I present here is simply my opinion and my approach to storage. My thinking about this topic has developed over two decades. I have had many discussions with folks who have different approaches. I have done the best I can to incorporate the things they do into my system where it makes sense. Still, what works for me may not work for you.
Before I get started, there are many links to commercial products in this article. I am not affiliated with any of these companies or products or getting any compensation for speaking about them here. I link to them in case someone has a question about what they are or where they can purchase them.
With that introduction, let’s dive in.
The Basics
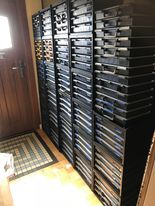
All ASL storage is about compromise. It needn’t be if you are blessed with a lot of space, the willingness to use it for ASL, and the money to take advantage of it. That doesn’t describe me. I doubt it describes many outside Olli and his wall of Raaco. Let’s discuss the compromises.
Ease Of Retrieval versus Ease Of Storage
First, there is a tradeoff between ease of storage and ease of retrieval. Units which are easily retrieved–i.e. pulled from storage so we can use them in play–are stored with more accuracy–i.e. put into storage in precise ways to make locating the counter easier. This precision in storage means putting counters away requires more time as we put everything back into its proper place. This “everything in its place” is taken to the extreme when every counter has its own place.
Weigh this approach to simply sweeping everything into a large container with no organization. Retrieving counters for play will be time-consuming as we sift through every counter in the game to retrieve the ones needed. Cleaning up afterwards is a snap as we dump counters back into the storage en masse.
Density Versus Packed Air
The second tradeoff is also a retrieval tradeoff. The more densely we pack the counters, the more difficult retrieval is. This density can place multiple counter types into the same storage slot, filling the capacity of the slot until we use all the room, or both.
With taking all the space, tipping over the tray to dump out only the slot in question is likely a non-starter. Getting fingers or tweezers into the space can be difficult. If we store multiple counter types in the same slot, you will still have to sort through them, just on a smaller scale than everything in the same bulk container.
Putting things back into storage requires more precision than sweeping the table into a container. There is still a premium on precision in returning counters to where they belong. The real problems arise when there is little to no space remaining in the slot. This can make getting the pieces back to where they belong fiddly. Some will find that frustrating.
My Solution
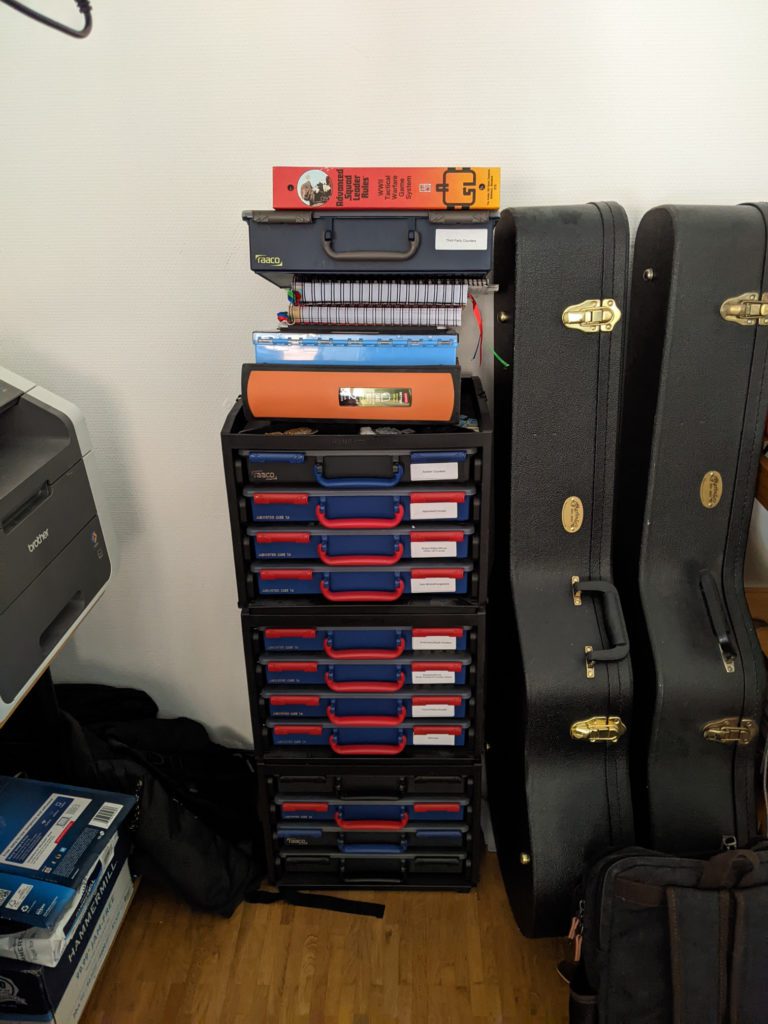
Over the years, I have used everything from Planno 3700’s to sandwich baggies. These days I use Raaco Storage boxes for counters. I have one Service Case 4X12 I bought from the Sitrep: Kitshop, which I think is no longer available. This custom case stores all my third party counters. I stored everything else in two handyboxes, each containing four Service Case 4X8. Each Service Case has a mixture of A75, A78, and custom 3D printed inserts. The Service Case containing my system counters contains A9-1, A9-2, and custom designed inserts.
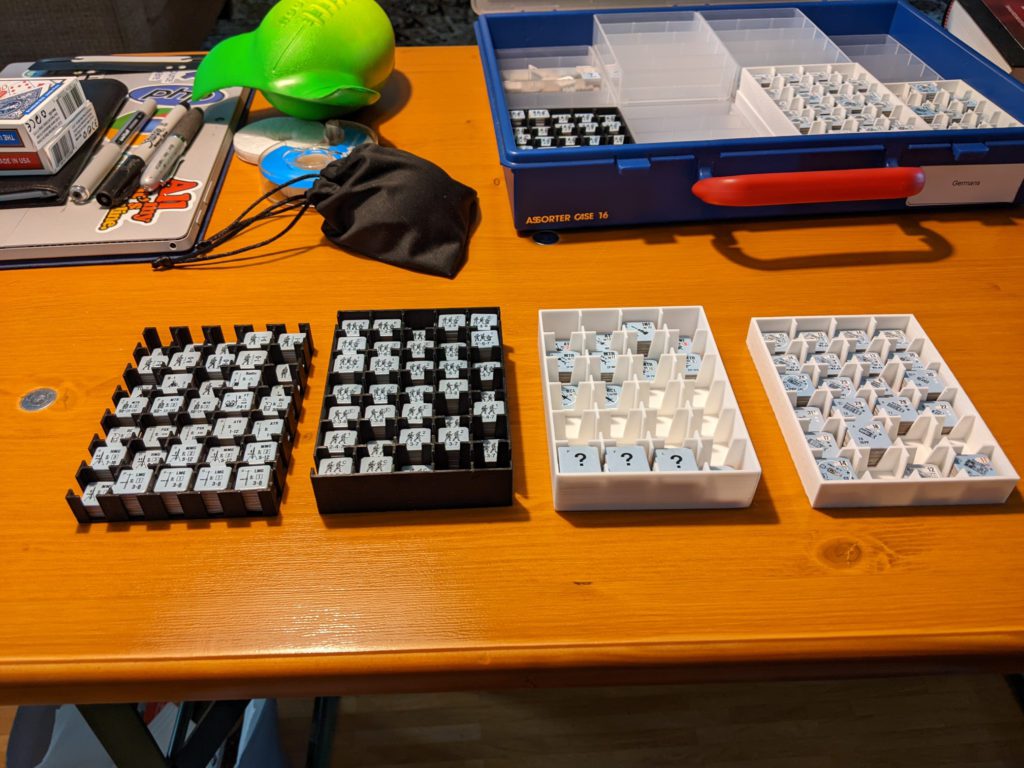
Only recently have I been migrating to custom made inserts (pictured above on right). I transitioned because of the release of Hakkaa Päälle, Croix de Guerre – 2nd Edition, and Hollow Legions – 3rd Edition by MMP. Each of these products increases the number of counters for the countries focused on. I squeezed the Finnish counters in with some reorganization. The next two pushed my storage beyond two Handy Boxes. Something had to be done.
3D Printing To The Rescue
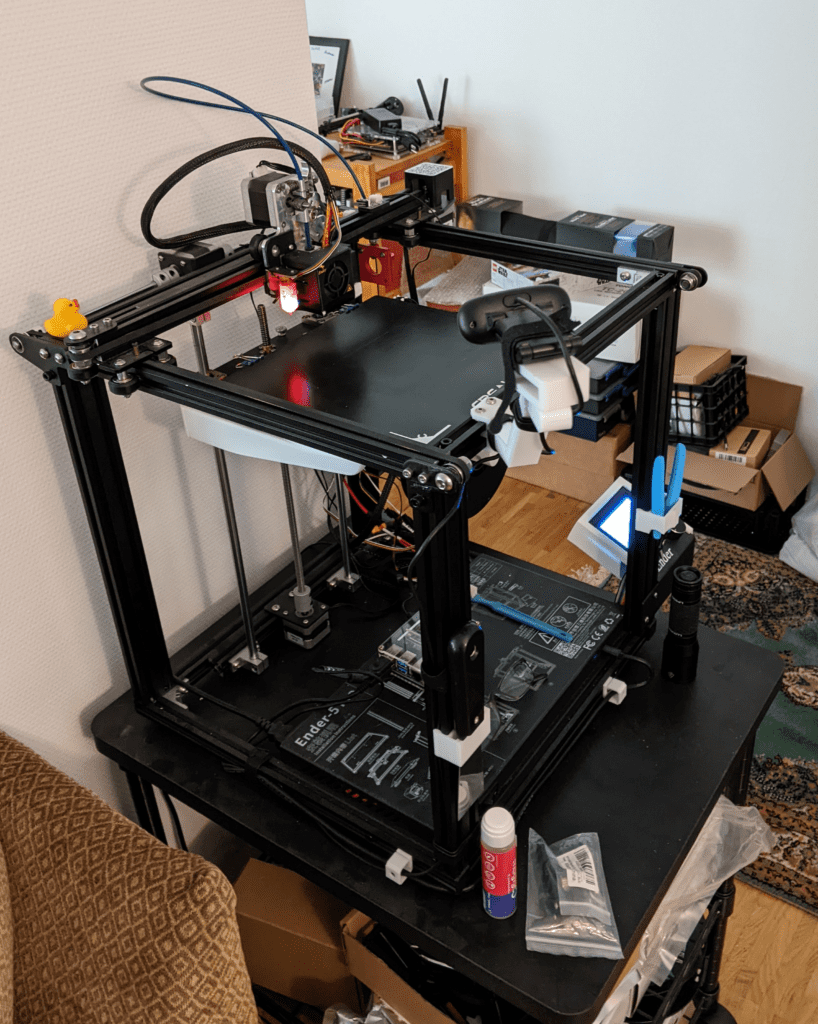
I am a hobbyist 3D printer nerd and I have been using 3D printers for a while now. I have used them to print Dungeons and Dragons terrain and miniatures. When I was more heavily into robotics, I used my printer to fabricate parts to mount sensors and solve problems I was having while I built my terminator (it was an autonomous vehicle which actively hunted my house cats and took pictures of them up to no good). While I am no expert, I can print things.
The second key was a fellow ASL’ers Steve Dennis and Stefan Fiedler. Steve makes a living as a CAD drawer. He has the talent it takes to create objects in CAD software. Steve created a series of Raaco inserts, which he shared. Steve’s designs were further developed and changed by other ASL’ers who share his talent. Stefan modified Steve’s original work. Dennis Malmström (Klas’ brother) scratch developed some as for me as well. Not only did these kind folks create these inserts in software, they freely shared the files necessary for printing them (.stl files) so anyone could use them. This was the key to shrink my storage back to where it needed to be.
How Much Compaction Are We Talking About
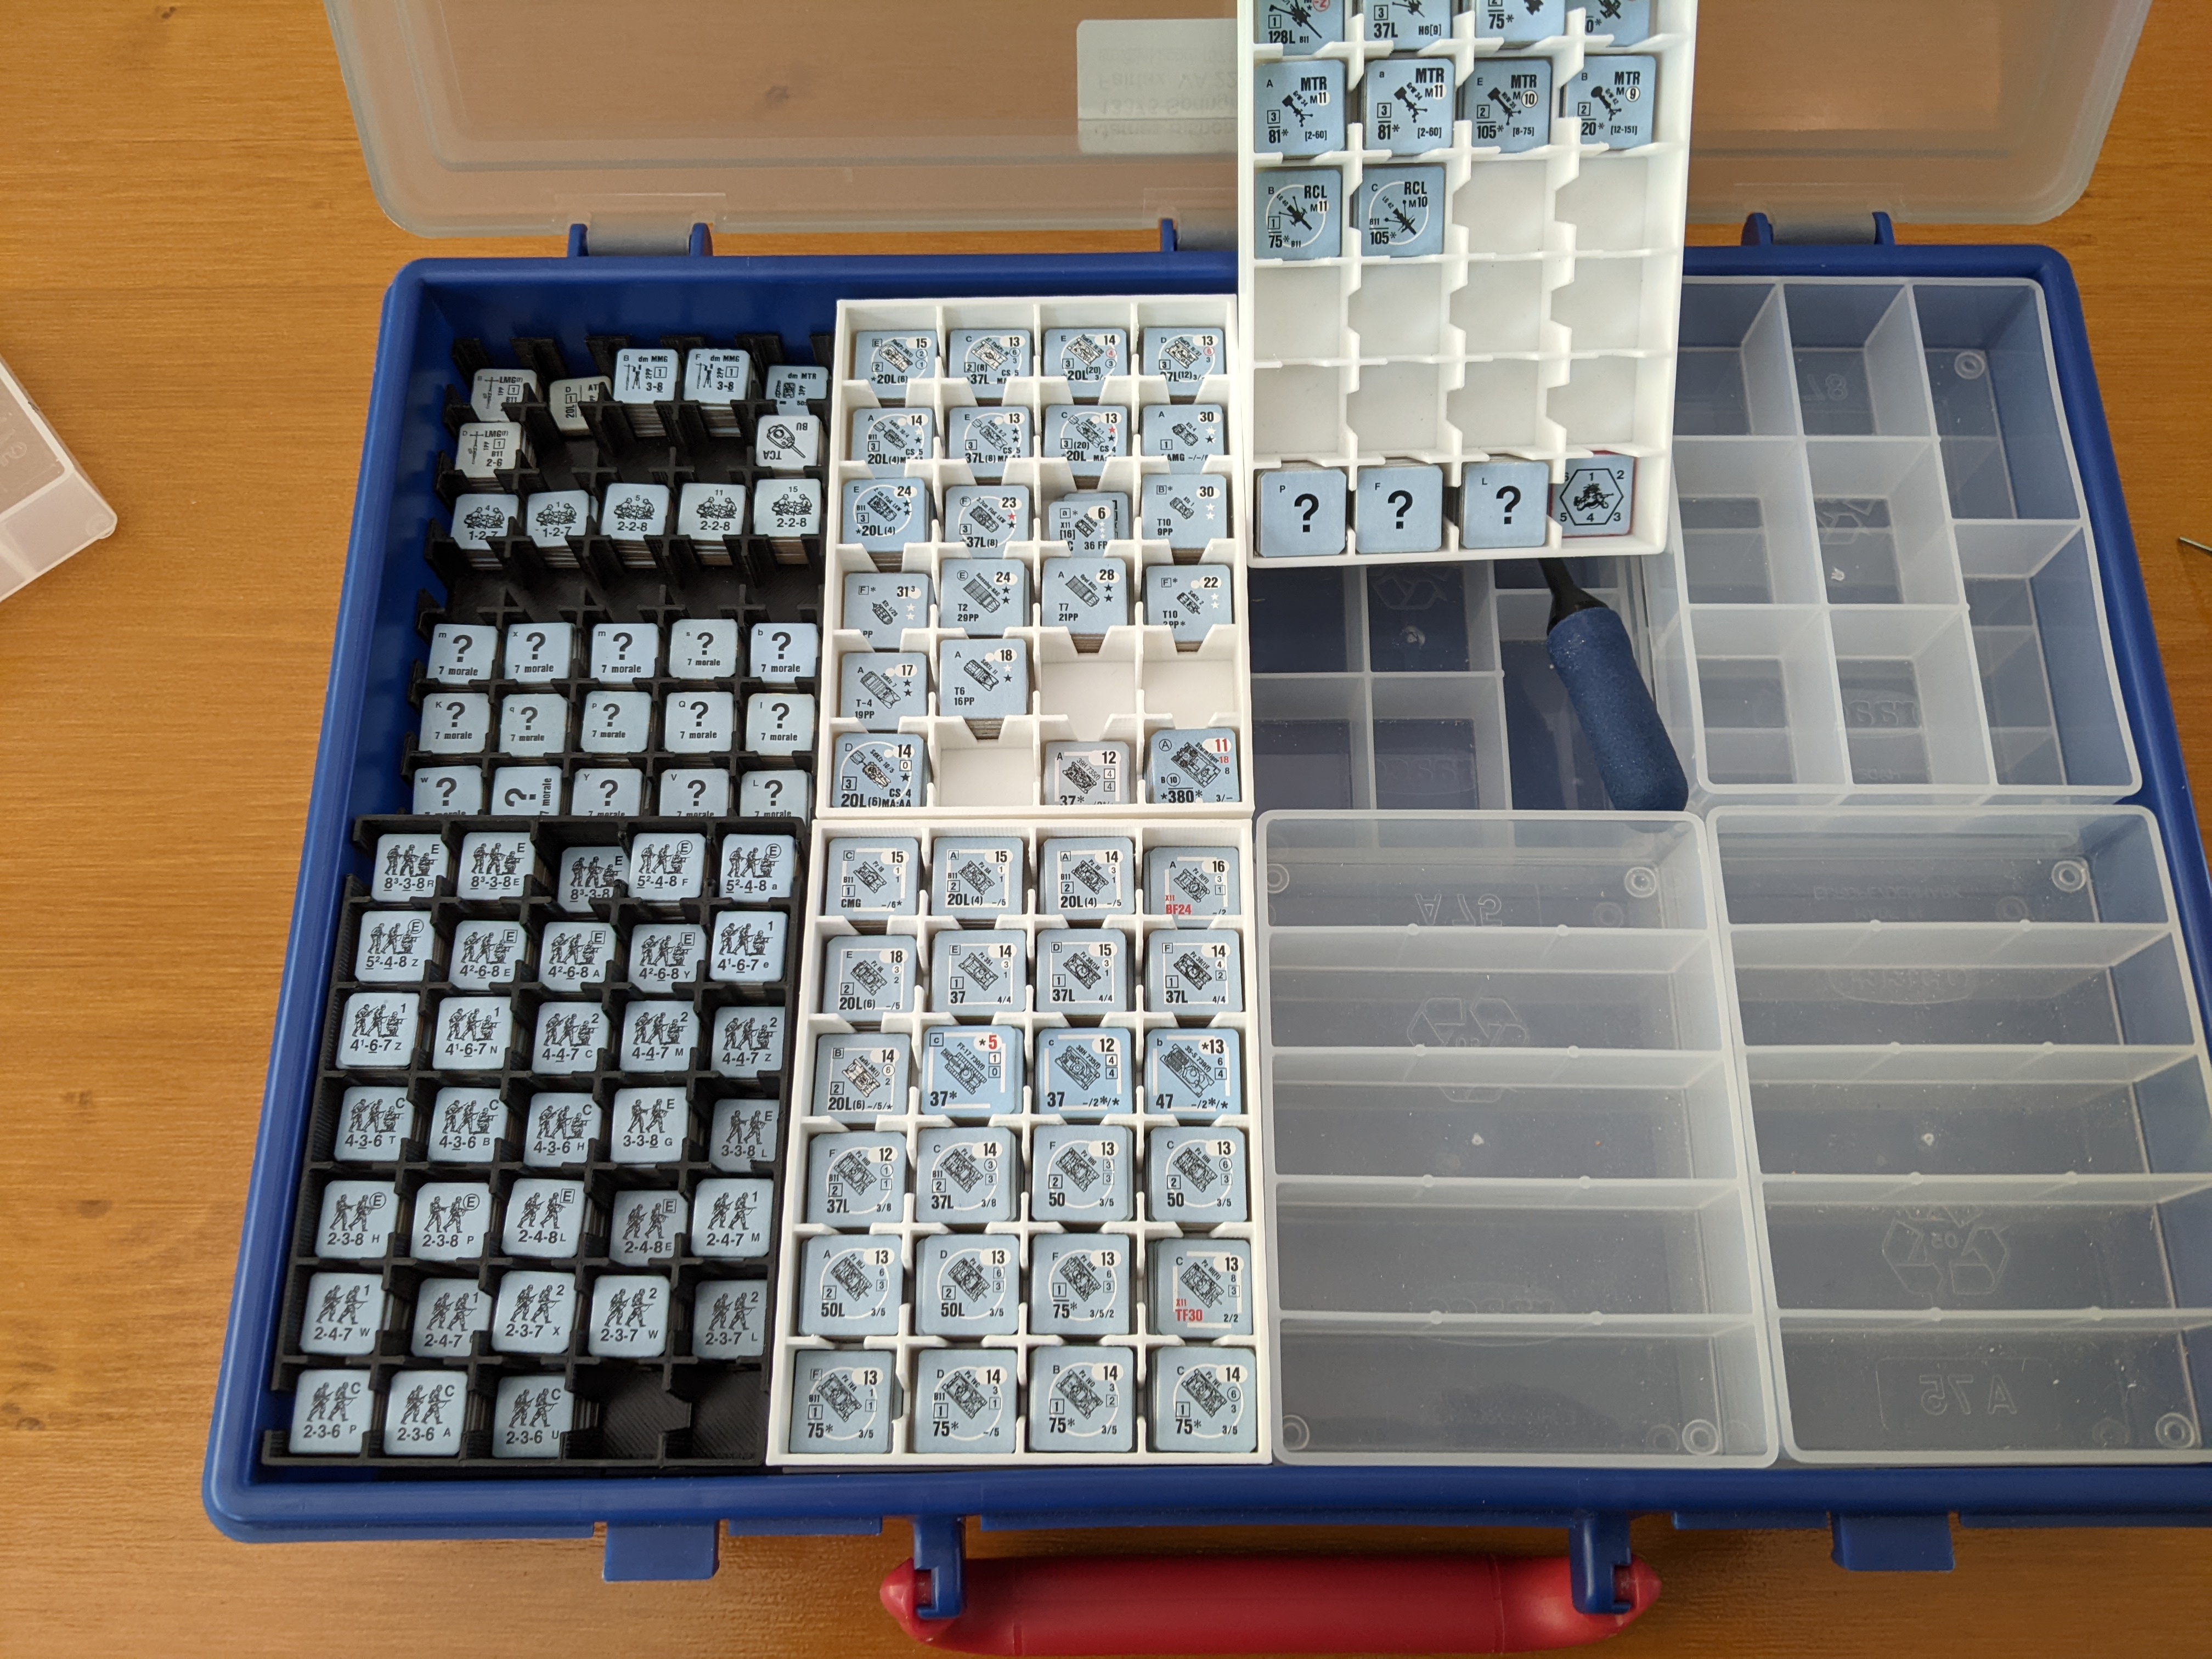
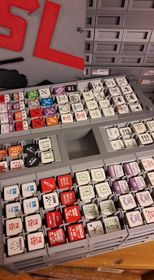
Pictured at the left is the Service Case containing my German counters. In it, you can see a mix of A75, A78, and custom printed counters. Typically, a Service Case stores A-series inserts two deep (notice the tilted insert with the empty insert under it). All the custom inserts but the bottom left are designed to fit three deep instead. Notice the top-left is waiting for a fresh insert to come off my printers as I type.
In this system, I store all of my ⅝” counters in Vehicle/Ordnance Note Order. Each of the counters has their own slot, or in rare cases, spread across two adjacent slots. I stack each of my ½” counters neatly into slots, face-up, making identification and retrieval easy.
Before I made the leap to printing my own inserts, this Service Case was filled with A75 and A78 inserts, which were filled. The count of unit types compelled me to store full- and half-squads in the same slots in the A75s. I had over one AFV type in slots in the A75s and a map allowing a person to look up which slot the AFV was in. When putting stuff away, you had to consult this map to make sure everything found its home.
Now, I am packing a lot less air in the inserts in use. The Service Case is only half-filled with inserts holding counters. And this is the first Service Case to get inserts for ½” counters.
Downsides
Just like ASL, there is no free lunch. To do this, you need to get the inserts printed. If you already have a 3D printer, you’re in luck. The .stl files are available on the Texas ASL site in their download section (search for .stl on that page). A kilogram of filament will run about $25 and can print 20’ish inserts. Inserts take 5 – 6 hours to print depending on how you set up the print run. It takes patience and a willingness to tinker to get good prints, but once you do, it is quite satisfying. I use a Creality Ender 5 Pro, which is no longer available. An Ender 3 Pro is a functional equivalent. After a lot of testing, I prefer the Hatchbox PLA filament.
Even if you don’t have your own printer, you can use the files. There are many 3D printing services that will print these for you. They aren’t particularly cheap to do this way, but when you factor in the cost of a printer and filament, plus the time to sort out how to do this effectively, it is likely to be a much cheaper approach. The first set of inserts I used were made this way.
Other Bits
Having the .stl files is only the start. You must also have a “slicer” software. This piece of software opens the .stl file and then makes thin horizontal slices (typically) through the model and converts these slices into “G-Code”. G-Code is fed to the printer to manufacture the piece. Of course, your slicer needs to be configured to speak your printer’s language. Fortunately, you can find profiles for printers from printer vendors. I currently use Cura. Cura is open source software and constantly updated. Your slicer also needs to know the profile of your printing material. Again, manufacturers make this available as well.
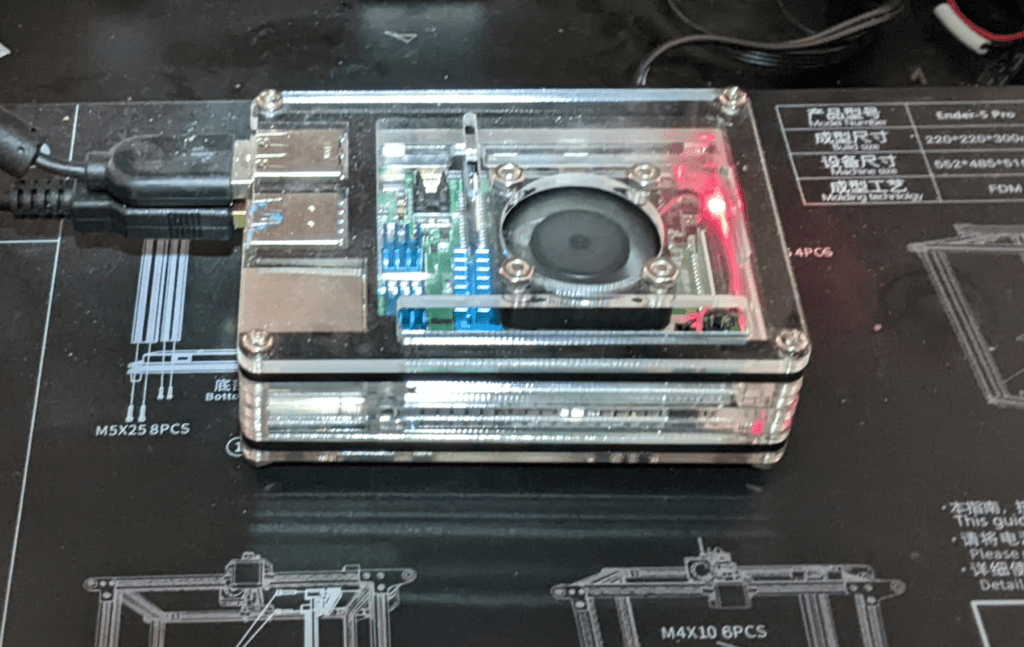
I also use a Raspberry Pi computer on a board to run Octopi (pictured on the right). Octopi runs on my local network and allows me to transfer files to and from my printer. It also allows me to remotely control and monitor my printer to make sure everything is running correctly. It has many open source plugins which can extend functionality to make the printer safer to run and operate (the hot end of the printer runs at 200C or higher to melt the plastic).
Other People’s Approaches
As I said at the beginning, there are many approaches to storage systems. You can see some of them on display on the Desperation Morale website. People there are using everything from custom made wooden cases to match boxes. If you can imagine it, I am sure someone has used it to store ASL counters. When I first started, I stored my counters in empty check-book boxes (remember when we physically wrote checks?).
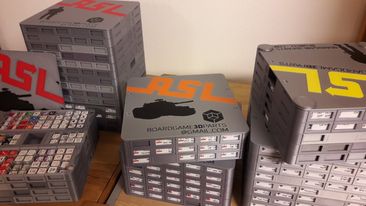
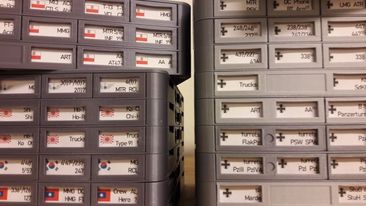
Still, if you want to see what the art of the possible in 3D printing is, I leave you with these beautiful cases made by Martin Durik. Pictured is my friend Michal Sedlacko’s kit. These cases are fully customizable. Inserts of different sizes and configurations are available for these trays. Martin manufactures them with different labels and names on top. They are stackable and can meld together with magnets, letting you stack as many of these as you need and to separate them into component pieces for travel if you wish. They truly are a state-of-the-art storage system.
See this YouTube video where Martin describes his system:
If you want further information, Martin has a Facebook Page called 3D Boardgame Parts. Martin’s contact information is printed on the lid in the YouTube video as well.
Conclusion
If people would like to expand on this article, I will consider it. It might be best to discuss one-on-one. The important thing to remember is that storage systems are highly individualistic. Sure, they share many of the same concepts and goals, but there are many ways to solve these problems. If it works for you and you can explain it to your opponent so he can pull and put away his counters, then it works. And that’s ultimately all that matters. Until next time. – jim


I was excited about this, when I first say people making 3D inserts, and I’m still excited about it. I have a friend who has a 3D printer, and when I saw the files published I asked the friend if he would make several. He said thanks, but no thanks, pointing out that to make 3 of the 1/2″ and 3 of the 5/8″ would take about a week, and he wasn’t set up for that. The local library has a 3D printer but wants to limit your printing time to 2 hours per session. I think that this is great, but actually printing the inserts will have to wait until my own budget allows for a 3D printer. But so much of gaming is aspirational anyway.
You can take the .stl files and look for a 3D printing service and have them print them for you. It is a little on the pricey side, but you save on printer and filament costs, not to mention the time.
I’ve got 2 seven year old girls and I want them to grow up making and creating things, so this is definitely on the overbrimming shelf of future projects. My friend also suggested using a commercial printing service. I think that I’ll just continue on with my A75 and A78 inserts for now. It gives me something to daydream about.
I also wanted to say thanks to people like Steve Dennis, Stefan Fiedler and Dennis Malmström who are willing to share of their time. One thing that I appreciate about the gaming hobby is the creativity of others and their contributions.
I appreciate your notes on your preferred printer and filament. I’ve filed them for future reference.
I also have a resin printer. I use that to print miniatures and figures for D&D. I play this with family.
I’ve glanced briefly at resin printers. What I’ve seen suggests that due to the toxicity of the resin in it’s liquid form, I’d probably want to keep it in the garage, and that it would not be kid friendly. Do you notice a significant difference in quality if you print minis using filament rather than resin? Not enough room or budget in my life right now for 2 printers.
Recommend this YouTube channel: https://www.youtube.com/c/3DPrintedTabletop
If you want high detail, nothing comes close to resin, especially the new 4K printers. I print terrain (buildings, dungeon tiles, tables, barrels, etc) with my FDM (filament) printer. Each has its niche.
Resin does stink and it isn’t my favorite thing to deal with but the quality is magnitudes better when printing fine details.
You don’t need high detail for case! A FDM if perfect for this job and it way more solid than resin! I know, I have a mini Farm of FDM printer and a bunch of resin printer. Resin printer is good for mini and terrain but not good for heavy usage! The part will be to fragile.
I don’t think I said FDM wasn’t suited for this case. I was answering Dan’s question “Do you notice a significant difference in quality if you print minis using filament rather than resin?”
For the record, FDM/filament work fine for printing Raaco Inserts. But if you’re printing minis–such as D&D minis–even a well tuned FDM printer can’t come close to a resin-based printer for fine details.
The Raaco Service Case below your rulebook appears to be an Raaco Assorter 80. It believe it holds 24 inserts in three rows of eight, or 50% more than a “standard” (Assorter 55) case in a Handy Box. (According to our Raaco Flyer, we’ve got two left.) Depending on how you sort your system counters, an Assorter 80 could probably hold most, if not all, HASL counters on the bottom level, with more generic counters on the top two levels.
I like the compactness of the 3D inserts, but miss the ability to label each cell. I get that this can be partly overcome by having a key on the lid. Martin Durik’s system is an interesting workaround that combines compactness and modularity with a modicum of “labelbility.” Thanks for bringing it to my attention. Not ready to jetison my Tanos Systainer system (which holds most of my ASL counters in Assorter 55s) just yet though. (See Mark Pitcavage’s DM site for photos of his system.)
On the subject of modularity, I like to use smaller Raaco Service Cases (e.g., PSC-06, which hold only two inserts, or PSC-05, which hold eight inserts) to house more specialized counters such as the German divisional counters found in Festung Budapest, or Swedish Volunteers.
In an ideal world, I’d have cases custom built to house each nationality/HASL set with no wasted space and “baked-in” labels.
https://jekl.com/wp-content/uploads/2022/05/PXL_20220429_125146130.jpg
https://jekl.com/wp-content/uploads/2022/05/PXL_20220429_125129449.jpg
As you can see, my system counters all lay flat, face up. Sometimes a “backside” counter can be a little hard to find, but I know where almost ALL of those are. I don’t worry about HASL storage. I don’t play them anyway.
Hi Jim
I always enjoy reading your articles. I’m considering asking my local 3D print service for a quote to print the custom RAACO inserts, but I’m a little confused about dimensions. Would you mind clearing this up for me?
On the Texas ASL downloads site there are 2/3 height .stl files for 1/2″ and 5/8″ counters. I’m presuming that by 2/3 they mean that each is 2/3 the height of an A75/A78. Your article mentions that they sit 3 deep, which seems to confirm my guess, so would that mean I could use a combination of 12 inserts instead of 8 of the A75/A78?
I just wanted to share what I found when looking for an online 3D print service. I found many options, and I picked one (Craftcloud3d) and had them print a couple samples for me so I see what the quality of their print jobs, and to decide if this was a plan I wanted to invest in.
I felt the samples were definitely pricey, but that was just 1 of each the 5×7 and 4×6 inserts. When I go back and price out an order for enough of these inserts to fill a single RACCO box it came to 45.82, and that price includes the postage, for the 24 inserts. So about 1.90 each when purchased in some degree of bulk and using only the most basic materials and print options. So not so bad in my opinion, your milage may vary.
The trick is finding the correct RAACO box here in the US. Any suggestions on that would be welcome.
Hey Mark,
Sorry it has taken me so long to reply. Between going to the US for Christmas, returning home, not feeling well for a few days, and generally just pulling myself back to together, this message fell through the cracks.
Your experience mirrored my own WRT getting the inserts printed by a professional. I came it at around the same price point. I went the 3-D printer route as much for a chance to learn and play as anything else. I know of at least one other person printing his own inserts using a 3-D printer at his local library. All he has to do is bring the material.
WRT a North American Raaco distributor, Chris Doary used to carry some in his KitShop (http://asl-battleschool.blogspot.com/p/kitshop-store.html) but I don’t think he does anymore. You can try giving him a call and see what he says.
You can find many European distributors, but the shipping costs are crippling. If you have a friend in the military living in Europe, you may be able to have them take shipping to their European address and ship home via the APO system. Absent that, if you’re coming to a European tournament or know of a European player coming to the US who can mule it to you, you can get them cheaper that way. As they say, good, cheap, or easy: pick any two. Best of luck.
I am also using 3D printing to make my own inserts, based on Steve Dennis’ original design – which I recreated in OpenSCAD format. This makes it possible to have very customizable models: my current design is now a rectangular box, 2/3 of the height of the standard Raaco inserts (seems similar to what Jim is using), but with a sliding lid at the top to make the inserts spilling-proof.
One advantage of having a lid at the top is that I can print text describing the contents – hence the use for customizability. PrusaSlicer (which is designed for the Prusa printers, but can produce Gcode for any FDM printer) even notices the pattern in the lids, and offers to insert a filament change in the print so I can use a different color for the letters and the rest of the lid (this means I have to sit around during the print, though).
Wish I had Martin’s skill for designing models, though 🙂
I recall seeing your work on Gamesquad. I should take pics as I have updated my process some. Perhaps I will update my story in the near future. It involves 120lb paper and I really like it.
Hi Jim,
Good to see you recently!
Love the article and concept, so I downloaded the STL files and have printed the six first trays now. No issues and amazing compact system that I will use for the during-play counters.
Thanks!
Lars
Hey Lars! Glad to see you too. I have recently come into some even more compact trays (half height, 11.2mm) that I have been putting into my system. I like them a lot. I just have not sent them to the Texas ASL site as I have been too busy. I am glad you like them!
You have seen my piece of shit system Jim. I have kept the plastic boxes that I used back in the 80’s and added small boxes and ziplock bags.
Did not have the heart to bin those old boxes………..only other person I have seen use them is Pete Phillipps. He has a similar problem getting rid of old stuff – witness his leather (well mainly gaffer tape now) jacket.
I’ll never understand ASL players obsession with storing squares of cardboard. Some of them spend more time OCDing about paper than actually playing the game they supposedly love. It reminds me of WH40K players who invest thousands in miniatures and paint. never play the game, just spend their lives organizing, displaying, painting and looking at their miniatures. Make a post about counter storage in the FB group 100 likes, 60 comments. Make a post about actual gameplay, 9 likes, 2 comments. Just throw the cardboard in cheap storage trays, forget about it, and start playing! Yoinks!
I posted a pic of me playing SL in 1975 (I think) and it got 400 comments and about as many likes, etc. Someone reworked one of my posts with fancy graphics (which were admittedly good) and they got a hundred or more likes and more comments than I typically see on any of my ACTUAL ASL content.
The lesson I have learned is content doesn’t “sell”. People want to be amused and outraged. Actual content is a waste of time if you want feedback or input.
I started this adventure because I wanted to engage in a conversation about the game. I hoped to spark discourse. I wanted to get people talking about ASL, helping one another to learn and improve. Instead, I am basically talking to myself. It leaves me more and more disinterested in writing. What’s the point? When a derivative product with fancy artwork (which I didn’t create) garners more discussion about the pictures than any of my work and not a single point about the actual content I did create, I don’t know why I should continue.
I tried.